Home and Learn - Free Excel VBA Course
1.3 Watch as Excel records a Macro
You can watch as Excel records a macro. That way you'll get a feel for how things work. However, Excel tends to overdo it when it adds code, so don't think this is the type of code you'll have to write. Your own code will be much shorter!
First, make sure you have Excel and the coding window open side by side. Like this:

In Windows you can easily have two programmes open side by side by doing the following:
- Click on Excel to activate it
- Hold down the Windows key on your keyboard (the Windows key is between the left CTRL and left ALT key)
- Keep it held down and press the left arrow key
- Click on the coding window to activate it
- Hold down the Windows key on your keyboard
- Keep it held down and press the right arrow key
- Both Excel and the Editor should now be side by side, as above
If the above doesn't work for you, then just position the two windows as best you can.
But we can now record a macro and watch as Excel does its thing.
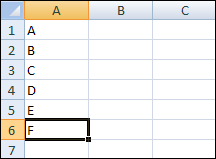
We'll record a simple macro that right aligns text in a cell. So enter the letters A to F in the A column of Excel:

On the Developer tab, locate the Code panel and click Record Macro:

![]()
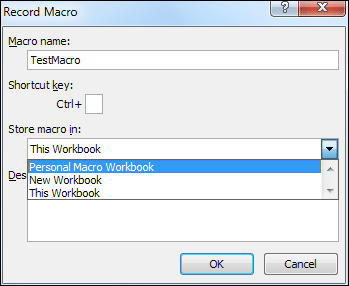
The Record Macro dialogue box should appear:

For the Macro Name, type TestMacro. Click the dropdown box for Store macro in and select Personal Macro Workbook:

Click OK.
To record the Macro, select the cells A1 to A6. Click on the Home tab on the Excel ribbon. Locate the Alignment panel and click the right-align option:


Switch back to the Developer tab. On the Coding panel, click Stop Recording:


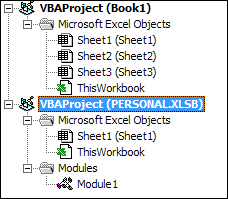
Now have a look at the coding window. If you haven't yet recorded a macro you should see a new item appear in the object window, just below your sheet objects:

The new object is called Personal.XLSB. Click the plus symbol to expand the entry and you'll see some yellow folders. Expand these as well:

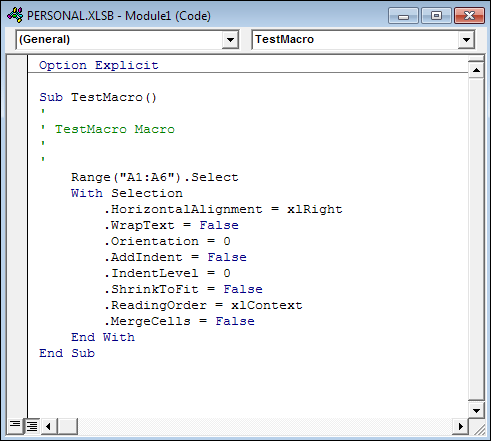
Double click Module1 and you'll see the code for the Macro you've just recorded:

(Don't worry if your coding window doesn't have the Option Explicit at the top. We'll explain about this in the variables chapter, later.)
Excel has created a Sub of its own. You don't need to understand all the code at this early stage. But you can probably pick out a few things that make sense. The cells A1 to A6 appear on the first line (the green lines are comments and will be ignored). This happened when you selected them. With the selection, Excel has added some formatting. The one that makes sense is xlRight for the horizontal alignment.
All those other lines highlight the fact that Excel tends to add lots of code unnecessarily. When you get some experience writing VBA code you'll spot lots of ways you can reduce the code Excel writes. For example, the whole of the macro above could have been replaced with just one line. This
Range("A1:A6").HorizontalAlignment = xlRight
We'll explore Ranges in the next section. But this single line of code is more
readable - it reduces Excel's code to just the bare minimum.
Now that you've recorded a macro, click the File menu in the VB Editor. From the File menu, select Save Personal.XLSB.
Let's try another macro. With this one, we'll just select the text and make it bold. Keep Excel and the Coding Editor open side by side.
Return to Excel. Click on the Developer tab again, and click Record Macro on the Code panel. You should see the Record Macro dialogue box appear. Change the name from Macro2 to MakeBold. Leave Store macro in on Personal Macro Workbook. Click OK.
Highlight cells A1 to A6 again. Click on the Home tab in the Ribbon. From the Font panel, click the Bold icon.
Keep an eye on the coding window when you do all this. You should see Excel automatically adding the code for you Sub. Something like this:
Range("A1:A6").Select
Selection.Font.Bold = True
Stop the recording by clicking on the Developer tab, then the Code panel.
Exercise
Record a new macro to make the text in cells A1 to A6 a different font, a different
font size, and a different colour.
When you complete the exercise above, you should find that Excel adds quite a lot of code for what seems like simple job. However, you should bear in mind that most of what Excel adds is not needed - your own VBA code will be a lot shorter!
Before we move on, it's best to delete all these macros. To do that, click on the Developer tab. From the Code panel, click on Macros:

![]()
You should see the following Macros dialogue box appear:

If you get an error message about Excel not being able to delete macros while the Personal work book is hidden, click Cancel on the dialogue box. From Excel, click on the View ribbon. Locate the Window panel and click Unhide:

From the Macro dialogue box, though, select a macro on the left and the click the Delete button. Do the same for all the macros on the list. Save your Personal workbox in the editor again (File > Save).
We're going to take a look at something called the Range object. Before we get
onto Ranges, though, let's take a closer look at how the Excel dot notation
works. We'll do that in the next section below.
Next Lesson: 1.4 Dot Notation >