1.8 Resize
Home and Learn - Free Excel VBA Course
9.3 Launching your Excel VBA User Form
A User Form can be launched in a few different ways: you can launch your user forms from a button on a spreadsheet, just like you did when running a Sub from a button; and you can also add a new item to the ribbon bar at the top of Excel. In this section, you'll see how to do both. You'll use the form you created in the previous two lessons.
Launch a Form from a Button on a Spreadsheet
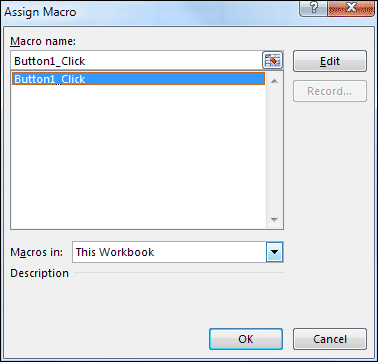
Go back to your spreadsheet and add a new button. When the Assign Macro dialogue box appears, select Button1_Click:
When you click OK, you should see a coding window appear.
To launch a form, you need the Show method after the name of your form:
Sub Button1_Click( )
UserForm1.Show
End Sub
Add the line to your own Button1_Click Sub.
Now go back to your spreadsheet. Click your button and you should see your form appear:

Launch a Form from the Excel Task Bar in Excel 2007
(If you have Excel 2010 or later then you can skip this section and go on to your lessons here: Adding New Tabs to the Excel Ribbon. )
If you don't want to place a button on the spreadsheet itself, you can add a new button to the ribbon at the top of Excel. In Excel 2007, however, you can only add items to the Quick Access toolbar which appears at the very top:
![]()
Starting from Excel 2010, you can customize the ribbon itself, adding new tabs and new groups. We'll do that in the next lesson. If you only have Excel 2007, then here's how to launch your form from the Quick Access toolbar.
First, we need to create new Sub in the Excel VBA Editor. We can then add our UserForm1.Show code to this Sub. Doing it this way means we don't have to have a button on the spreadsheet that launches the form.
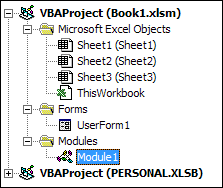
From the Project Explorer on the left, double click on Module1:
When you double click Module1 you should see a new coding window open. Add the following code to the window:
Sub CallUserForm( )
UserForm1.Show
End Sub
So the name of the Sub is CallUserForm. We want to Show the form called UserForm1.
With the Sub created in the Module window, it will now appear as a macro when we customize the Quick Access toolbar.
So click the round Office button at the top left of Excel 2007. Click on Excel
Options at the bottom:

When you click on Excel Options, you'll see Options dialogue box appear. Click on Customize from the list on the left:
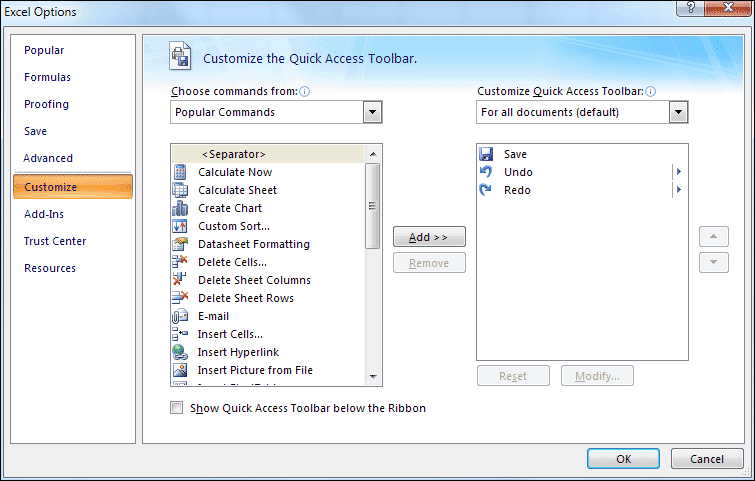
Now click the dropdown list at the top and select Macros from the list:

When you select Macros, you should see the CallUserForm Sub appear in the listbox below it.
With CallUserForm selected, click the Add button in the middle:
The listbox on the right shows all the commands added to the Quick Access toolbar. The first one is Save, then Undo, then Redo, and finally our CallUserForm macro.
To change the icon, click the Modify button. You'll then see a dialogue box appear. Select an icon, and change the Display name:

Click OK on the Modify button dialogue box. Click OK on the Options dialogue box as well to return to Excel.
Take a look at the Quick Access toolbar at the top of Excel 2007 and you'll see the icon you selected:
![]()
Test it out. Click your new icon and your form should appear.
In the next lesson, you'll see how to add new tabs to the Excel Ribbon.
Next Lesson: 9.4 Add New Tab to Excel >